Color Block Jam Level 525 Solution Walkthrough
Learn how to complete Level 525 of Color Block Jam. Master the techniques and strategies needed to progress.
This level has 3 different solution videos
Solution Videos (3)
Color Block Jam Level 525 Walkthrough for All Versions
Level 525 changes between versions. Match the screenshot first: one layout is built around a central light-blue 12 arrow block, while another is a maze-like board with side gates and long vertical arrow pieces.
Level 525 Version 1
Version 1 - Central Light-Blue 12 Block
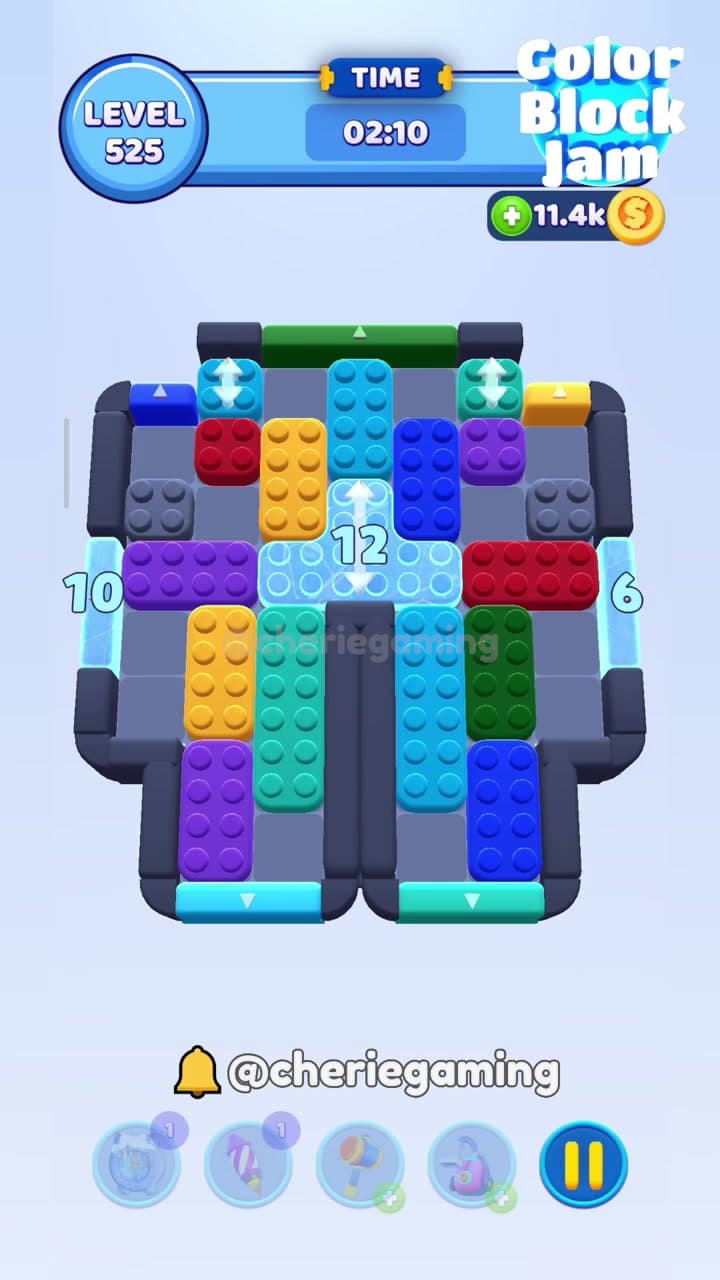
This Level 525 version uses a vertical board with blue, green, yellow, purple, red, cyan, and teal exits plus a central light-blue 12 blocker.
Board Analysis
- Top exits include blue, green, and yellow. Bottom exits are cyan and teal, while both side edges have numbered light-blue gates that restrict when side lanes can fully clear.
- The central light-blue 12 piece is both a blocker and a timing piece. It sits across the middle and prevents the tall cyan and teal columns from using the center.
- The purple horizontal block on the left and the red horizontal block on the right compete for the same middle row, so one side must be opened before the other is forced.
Recommended Route
- 1Start by freeing small top pieces: move the red, yellow, blue, and purple blocks near the upper row only enough to create vertical pockets.
- 2Open the bottom cyan and teal exits before committing the central 12. The two tall lower columns need those exits as soon as the center shifts.
- 3Move the left purple horizontal block after the left lane has space; this reduces pressure on the 10 gate and gives the central 12 somewhere to slide.
- 4Use the right red block to open the path toward the 6 gate, then move the green and blue vertical pieces down through their matching lanes.
- 5Clear the central light-blue 12 only when both lower exits are ready. After it moves, send the long cyan and teal blocks out before refilling the middle row.
Avoid These
- Moving the central 12 before the bottom exits are open.
- Clearing the right red block first while the left purple row is still blocking the center.
Level 525 Version 2
Version 1 Alternate Capture - Same 12 Block Layout
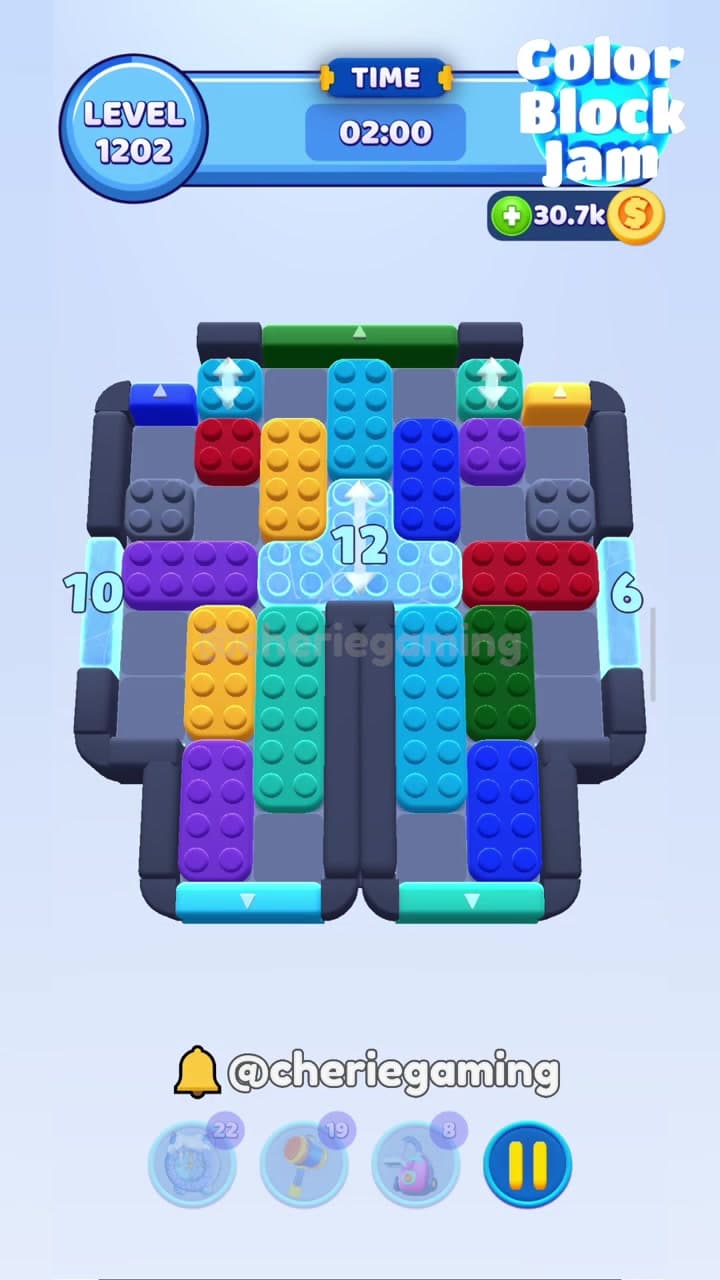
This alternate Level 525 capture keeps the same central 12 board, so the strategy is still to open bottom exits before moving the middle.
Board Analysis
- The board geometry matches Version 1: central light-blue 12, left 10 gate, right 6 gate, and paired bottom exits.
- The shorter timer means wasted side-to-side moves matter more. Prioritize moves that open either the lower exits or the central row.
- The tall blue and teal columns in the lower half are the cleanup pieces; they should not be trapped by the middle block.
Recommended Route
- 1Use the Version 1 route, but avoid exploratory moves on the left edge because the timer is tighter.
- 2Clear the upper mini blocks first, then shift the horizontal purple/red row pieces to make room around the central 12.
- 3Open the bottom cyan and teal exits, then release the central 12 and immediately drain the long lower columns.
- 4Finish by moving the remaining short top pieces through blue, green, and yellow exits once the center no longer blocks them.
Avoid These
- Treating this as a new puzzle and changing the opening order.
- Leaving the lower cyan column stuck behind the central 12.
Level 525 Version 3
Version 2 - Maze Board With Side Gates
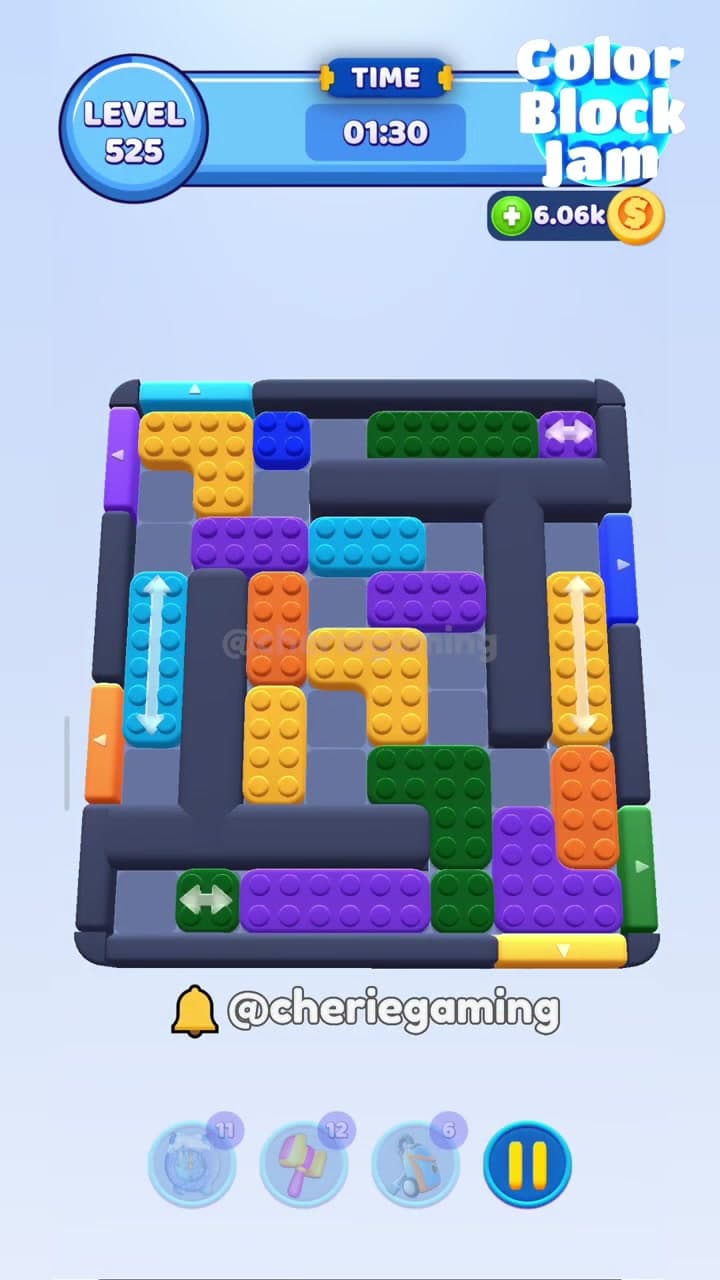
This Level 525 version has a maze-shaped board with left and right side exits, long yellow and cyan arrow pieces, and a lower purple exit.
Board Analysis
- Top exits are cyan, orange, and red; side exits include orange, purple, blue, green, and cyan; the bottom includes yellow and green/purple lanes.
- The long left cyan arrow column and right yellow arrow column are vertical timing pieces. If either is moved before its side lane is clear, it blocks the center.
- The large yellow L block in the center and the green L block at lower-right compete for the same lower-middle corridor.
Recommended Route
- 1Begin by clearing short pieces from the upper-left: the yellow L, blue square, and top green row should be loosened before the side gates are used.
- 2Move the left cyan arrow column only after the orange left exit and purple side lane have space. This opens the left vertical corridor.
- 3Use the new corridor to shift the orange and yellow center pieces. The large yellow L should move after the center is no longer sealed.
- 4On the right side, clear the blue and green pieces before sending the yellow arrow column through its side route.
- 5Finish by draining the lower purple, green, and yellow pieces through the bottom exits, keeping the central corridor empty until the last long block leaves.
Avoid These
- Moving both vertical arrow pieces early and closing the maze.
- Forcing the central yellow L before the upper-left pocket is open.
Expert Tips
- Identify whether your board has the central 12 or the maze layout before following the route.
- On every Level 525 version, open the exit lane first and move the numbered/arrow block second.
- Long vertical pieces should leave immediately after their lane opens; do not park them in the center.
Tips & Strategies
- 1.Advanced pattern recognition needed
- 2.Follow the video step-by-step carefully
- 3.Consider taking breaks if stuck